Mixing acrylic pigments
At first, it’s exciting and also intimidating, but mixing pigments is simply a matter of learning some tips and techniques to be able to economically mix, accurately mix and start a stay-wet storage system.
MIXING PALETTE -Probably the 'rip off palette' or the plastic plate for a palette were the most commonly used options with acrylics to mix up paints on.(single-use plastics are nearly all gone, so rip-off palettes and versions of this are the go now) Acrylic paints dry quickly and can cause problems because of wastage, so there are a few practices to adopt if you want to economise and also have ready-made amounts of all of your favourite convenience colours.
A glass mixing palette is great to mix on with a metal long-blade spatula, you can mix a secondary, tertiary, tint, neutral or rich grey on the glass, scrape 99.5% of it into a screw jar or stay-wet palette, clean the glass and then mix another colour. NB. This mixing glass is not your painting palette, it is best kept clean for mixing only.(get some glass out of an old frame or get an offcut from a glass supplier, tape all around the edges and back with white or neutral mid-grey card). You could also buy a glass palette(can be pricey). Use sleeves of contact or rip-off palettes for your painting palette (keep your glass one clean for mixing).
When you are working on a painting you can simply take some of the pre-mixed colours that you need and place them on a rip-off palette (a cheap home-made version can be made with an A4-sized piece of card/ board and several layers of cut-to-size pieces off a roll of contact (it is waterproof and holds it’s shape, no ripping), held on with two paper clips. When finished, just take one layer off and place it on top (or make a folded sleeve to start and close when putting it into a zip-lock bag. Some earth-friendly artists, keep using them until they have a full plastic layer, that can be peeled and used to make acrylic ‘skins’(for collages).
See next section for STAY WET PALETTES you can make yourself.
ONLINE ART CLASSES
GENERAL INFO LINKS
Value, Contrast, Light & Shade Module
STAY WET PALETTE - DIRECTIONS TO MAKE YOUR OWN
(or a commercial Stay wet palette can be found in some art stores, around $30)
OPTION 1 - XL jumbo size zip lock bag, wet chux(or similar), A4 sleeves of contact (shiny side of contact paper), cut A3 pieces and fold in two to make a sleeve. You can store a few sleeves in the one ziplock. Don’t overfill, leave little space between colours as they flatten and spread when closed, hence eliminating the air-drying of the acrylic paint. If working in liquid acrylics, add a little holding medium , thick medium or gel medium to stop the running/ bleeding of colours.


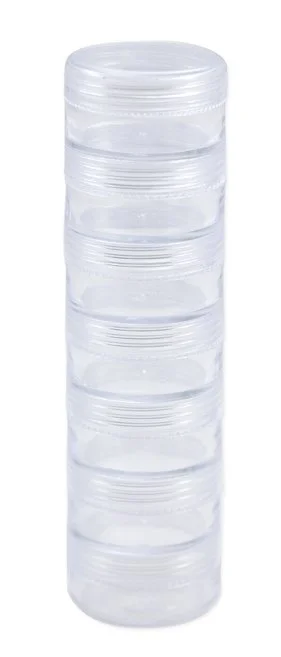
OPTION 2 - For heavy body paints, screw towers of beading jars are great (make sure to rub some vaseline on the threads so they don’t glue closed with any little smear of paint.)
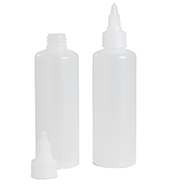
For liquid acrylics, the little squeeze bottles from Officeworks are great, or a travel bathroom kit from the cheap stores will have a few little bottles and a spray mister for your water too, get enough for storing secondaries, tertiaries, transparent mixes etc.

OPTION 3 - using recycled materials
a/ Save an egg carton (6 is ok for a limited palette, 12 is better) and brush a layer of cheap acrylic paint or white glue over all the lower cup shapes and inside the lid (so they are no longer absorbent). Some egg cartons have a very shallow cup so not worth it. Add your pre-mixed pigments for your project to the individual cups, lay a wet cloth stretched over and close the lid, wrap it in a plastic bag, and store it in the fridge. These have lasted for several months for students of mine, but will at least last for one project.
b/ AN OLD FAVOURITE - Ferrer Rocher chocolates come in a box with little cup shapes and a fitted lid, great for a stay-wet palette as well, JUST GLUE KITCHEN SPONGES ALL OVER THE INSIDE OF THE LID (use Araldite, Gorilla or Tarzan’s grip which work well with hard plastics) AND, AFTER THEY ARE DRIED, KEEP THE SPONGES WET.
The sacrifice in this option is that you need to quickly eat all of the chocolates, it is a dirty job but you have to do it!! You will end up with 12,24 or even 48 little 10-15ml cup-shaped receptacles of the colours you have mixed for your projects. Mix enough to have the cup half full, or the air will just dry them out if it is a just little bit (use the first option with contact sleeves when there are just smaller amounts than 10 ml)

OPTION 4 - sealed shallow plastic container (a little bit like the commercially available Stay-wet palettes)
- Take a thin/very low plastic box (like Tupperware but a cheap supermarket version) airtight container, the ones for pastry are good, low and flat, but long and wide.
- Cover the bottom with a damp cloth ( like wettex, chux, microfibre or flat kitchen sponges)
-Place a sheet of firm paper or card, rip off a palette page or grease-proof paper on top and when you make up your colours for a project, store a decent size thick blob of them on top of the card or grease-proof paper. Arrange as you would on any palette. The moisture can be kept constant by re-wetting the under cloth each week or for a few days. Keep the lid on and store it in the bottom of your refrigerator, they will keep for months, depending on how often you have them out.
- Replace the palette card layer on top with each new project or as required.
- Dont use this palette for further mixing. Take what you have there, mix or tint on another palette, constantly replacing the lid after you have what you need. Give a fine water mist before replacing the lid too.